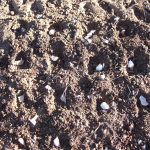
Clear Sky farm grew heritage garlic in the East Kootenay BC for several years. We aren’t currently offering garlic to the public, however we want to still show you how how we planted our top quality gourmet garlic for seed and eating in a Rocky Mountain Zone 4 Climate.
Step One: Breaking Soil
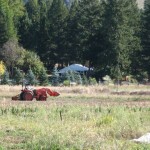
Though we’d always prefer to use no-till methods for better soil health, we often have a tough old hay field to work with, and unbroken sod. Thus out comes the tractor and rototiller. Here we are using a 30hp Kubota Tractor and a 5 foot Maschio Tiller to prepare our garlic beds. Some years we are able to use no-till methods, where we cover our garlic beds with mulch right after harvest in the summer. This keeps weeds down and creates healthy, food web rich soil for planting right into in the fall. Garlic beds should be rotated every 3-5 years to avoid disease.
Step Two: Popping Cloves
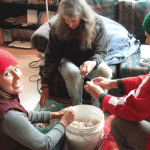
Garlic bulbs need to be broken up into individual cloves before planting. We select our seed from the larger bulbs from that year’s garlic harvest. Popping garlic cloves should not be underestimated – it takes nearly as long to pop a bulb as to plant a bulb. However, we do enjoy sitting in the fall sunshine chatting & popping cloves together each year.
Step Three: Remove Perennial Weeds
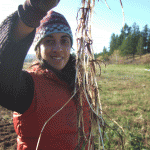
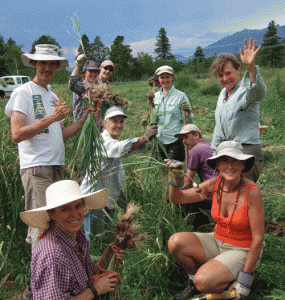
For us, the next step is often to remove all the big juicy quack grass (couch grass) and other perennial weeds, or annual weeds about to go to seed. We compete to see who can find “the mother of all couch grasses”. Sheniz, one of our farm volunteers is holding a record breaking example. Removing the strong perennial weeds at this time of year is a lot easier than fighting with them in the spring, when the tender young garlic shoots are emerging.
Step Four: On your mark, Stop & Drop
Next we use our friend David’s makeshift garlic hole marker to space out the grid pattern of where we will drop each clove – we space our planting hole 6 inches apart. Then another person comes along behind the hole marker person and drops garlic cloves in each hole. Our 2.5 foot beds held four cloves across this year – or about 8 cloves per foot of bed space.
Step Five: Diggin It!
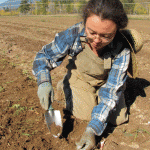
Once the cloves are laid out, we move up the row and plant each clove about 4-5 inches deep. In this Zone 4 Rocky Mountain climate and in other cold areas, freeze-thaw can cause havoc with your crop. Shallow planted cloves are more susceptible to weather extremes. Fertility & Irrigation: We also fertilised with organic compost & soft rock phosphate and lay our drip irrigation lines as we plant, before we mulch. What kind of fertiliser you use should be based on soil tests, preferably water soluble tests that show what is actually available to plants. Sustainable Soil Solutions in Vulcan Alberta is one company that does full Soil Food Web tests.
Step Six: Putting it to Bed
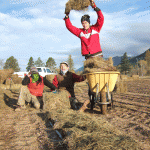
Finally we apply mulch – nice thick layers of it. It comes in handy in the spring to keep the weeds back and keep the ground moist. It also reduces freeze thaw extremes in the winter. Ideal mulch would be straw, or something without a lot of seeds in it. There isn’t much easily accessible straw in this area, so we used our neighbor’s organic ‘rained on’ hay that he can’t feed to his animals. When laying mulch, thickness will always depend on what you’re using and how dense its packed – so we ask the question: Would a weed still grow easily under this much mulch? If the answer is yes, we apply a bit more. In the spring, if the mulch is too thick for the garlic to grow through, you might need to remove some and put it back on later when the young shoots have poked through.
